How To | Enable Third-Party Controls in Zoom Rooms
Learn how to enable third-party controls in Zoom Rooms with this comprehensive guide.
Requirements
Before Beginning
Ensure you have the following:
- A Zoom Rooms Compute and Zoom Room Controller that have been tested with the Q-SYS Room Control Application for Zoom Rooms
- A Q-SYS Core processor that is connected to the same network as the Zoom Room Compute and Controller device
- Verify that Q-Sys Designer software is on version 9.10.1 or higher
- The Q-SYS Control for Zoom Rooms App employs web-based technology to transmit the UCI to the Zoom Room Controller. It requires an internet connection to access the website https://control-zr.qsys.com and must have the capability to resolve this URL.
- Access to Zoom Rooms administrator account
- An administrator account with Marketplace role and edit permissions is required to add apps from the Zoom App Marketplace.
- An administrator has enabled Zoom Apps on the account.
- Log in to the Zoom Web Portal and go to Account Management -> Account Settings -> Zoom Apps and enable Zoom Apps Quick Launch Button.
- More info from Zoom click here.
Initial Zoom Rooms and Q-Sys Configuration
Complete each step before continuing down the page:
- Create and install a certificate on a Q-SYS Core to enable secure connections for Zoom and Google Third-Party controls, OR prepare to utilize an alternative connection method, such as the IP address or domain name of the core
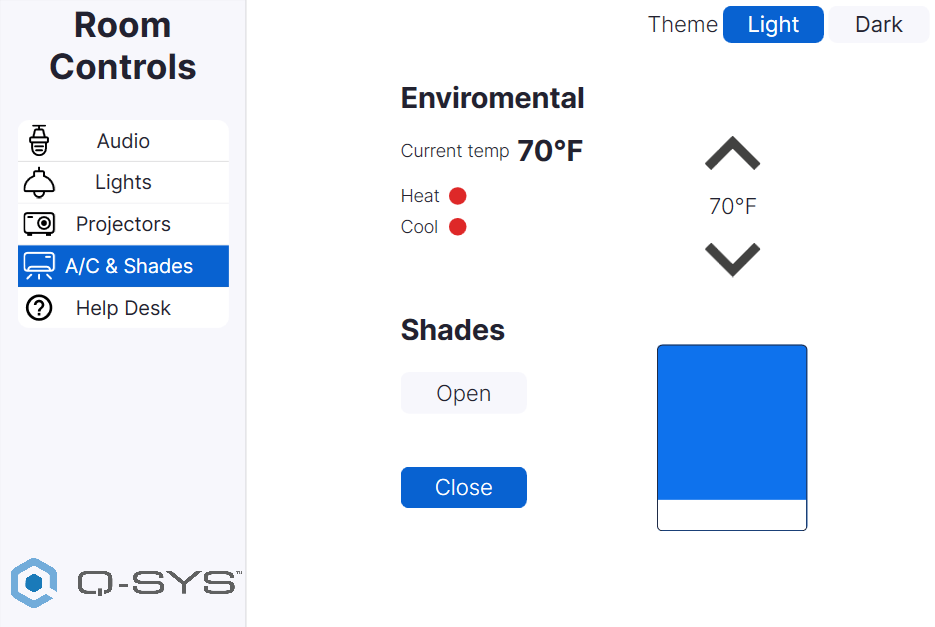
- Create your UCI for Zoom Room Room Controls. We strongly recommend utilizing the Zoom CSS Design found in Q-Sys Asset Manager
- Create a UCI link from your Q-Sys Core, this information will be entered in your Zoom Rooms Admin Portal
Procedure
- Sign in to the Zoom App Marketplace as an admin or owner.
- Search for the Q-SYS Room Control App to add users on your account or click here.
- To the right of the app name, click Add.
The app authorization page is displayed, providing details on required app permissions. - At the top of the page under the As an admin, add “__” for section, choose one of the following options:
- All users: Add this app for all users on your account.
- Users: Search for and select one or more users on your account to add this app for.
- Myself: Add this app for only yourself.
- (Optional) Deselect the Send email notifications to users I’ve added checkbox to prevent Zoom from sending an email notification to the users you are adding the app for. By default, this option is selected.
- Click Allow to authorize the app for the selected user(s).
Once added, users will see a notification in the desktop client and potentially receive an email notification from Zoom. - Once the Q-SYS Room Control App is added use a account that manages or has access to your Zoom Room devices.
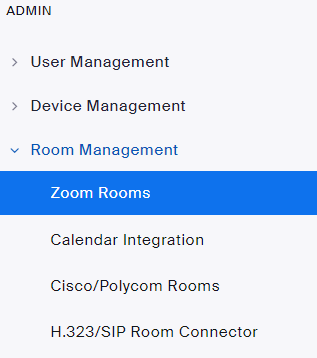
- Click on Room Management > Zoom Rooms.
- Select the proper Zoom Room that you want to configure
- Click the Room Settings text at the top center of the screen.
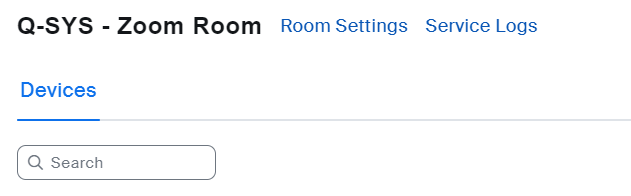
- Select the Devices tab on the left side of the screen, and scroll down until you see Enable Room Controls.

- Enable the Room Controls and under the added apps section select the Q-SYS Room Control App.
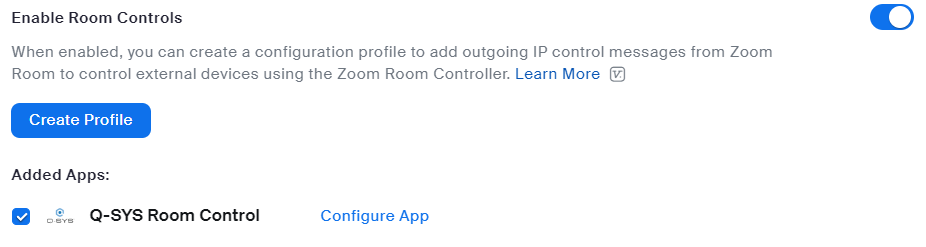
- Select the Configure App text on the Q-SYS Room Control App.
- In the Popup window select Authorization Bearer Token as the Authorization method.
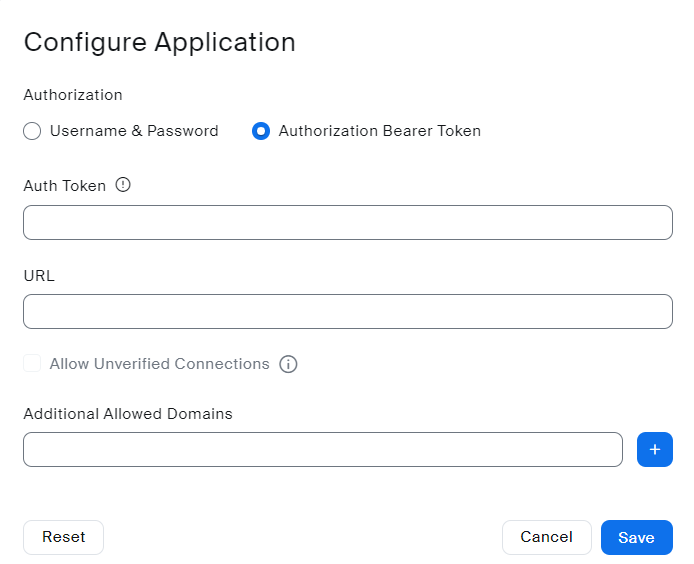
- In the “Auth Token” field paste the token that you received when creating a UCI Link.
- Review if needed: How To | Create a UCI Link for Zoom Rooms Third-Party Controls
- Paste the IP address, or FQDN (Fully Qualified Domain Name), of the Q-SYS Core in the Additional Allowed Domains field of the Web UI and click the Plus icon. (This must match the UCI URL FQDN and be all lowercase). After clicking the Plus icon, the IP address or domain name of the core will appear below this field
- Example:

- Check the box that says “Allow Unverified Connections”. This box can remain unchecked if you have uploaded the proper Security Certificate.
- In the Web UI click the Save button.
- It may take a few minutes for the settings to initiate in the Zoom App. Reboot or Relaunch the Zoom Room Controller device to fetch the configuration.
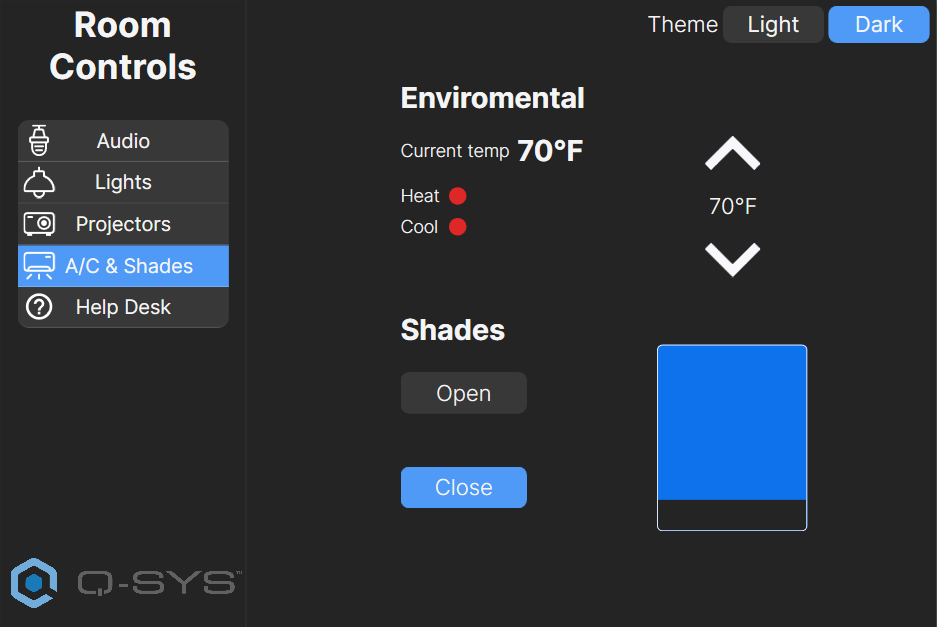
- You should now be able to view the Q-SYS UCI control on your Zoom Room controller by pressing the Room Controls icon.