How To | Create a Certificate for Third-Party Controls on UC Platforms
Learn how to generate a certificate for third-party controls on UC platforms, enabling you to seamlessly integrate and utilize these controls in your application without any compatibility issues.
Procedure
Caution
The steps below should be carried out by an IT professional with an understanding of certificate handling and domain DNS settings.
Note
To ensure secure communication between Q-SYS and UC third-party controls, it is recommended to use a Trusted CA certificate public or private/internal and follow the instructions provided below.
Use the following steps for creating a certificate for Zoom and Google Third-Party controls:
- Use a browser to go to the IP address of your Q-SYS Core or click on the “Open Core Manager” link for your Core in Q-SYS Configurator.
- Ensure that your Core is named how you would like it to be named in Network > Basic > Hostname
- Navigate to Network > Date & QTime and ensure that the date and time are correctly configured.
- Navigate to Network > Services and ensure that HTTPS is enabled on the LAN that the Q-SYS Core and Zoom Room device will be connected to.
- Navigate to Network > Certificates > Generate CSR
- Fill out the form, ensuring that you have the correct information.
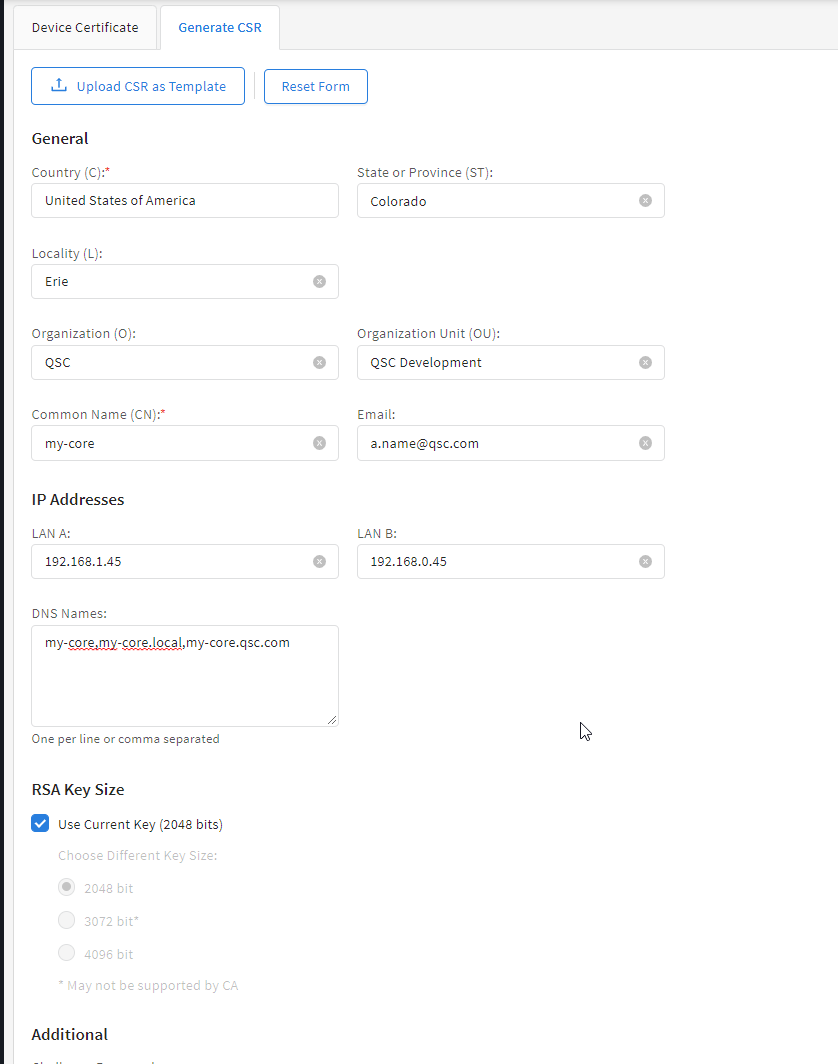
Note
Unless otherwise specified by your IT team, you MUST include the fully qualified domain name under DNS names, e.g., my-core.qsc.com
- Once you have finished filling out the form, click the Generate CSR button. Download the file and have an IT Professional create the certificate.
Note
IT Professionals will need to ensure that they change internal DNS to match the DNS names that were entered in the DNS Names field of the CSR form. The certificate must be signed by a trusted certificate authority, rather than a self-signed certificate. More details can be found here.
- Once the IT Professional has created the certificate, they should send an encrypted certificate back to you. Go to Network > Certificates > Device Certificate and click “Install Certificate”. Paste or upload the certificate and click “Install.”
Note
Certificates must be PEM-encoded (ASCII, base64).
- Reboot the Q-SYS Core. (This step is necessary for the Core to complete the certificate installation.)
- To ensure the certificate is valid, use Google Chrome to the the URL of your Q-SYS Core, including https:// (https://my-core.qsc.com). You should see a secure connection indicator in Google Chrome, next to your URL. If your connection is not secure, work with an IT professional to ensure that the certificate and network environment is setup correctly.
For more information about certificate setup, see the Network > Certificates topic in Q-SYS Help.