How To | Configuring SPA-Q Series amplifiers for standalone use
Learn about how to configure the Q-SYS SPA-Q Series amplifiers to work in standalone mode.
Procedure
Although SPA-Q Series amplifiers are primarily intended to be used on a Q-LAN network with a Q-SYS Core processor, they can be configured for standalone operation if needed. In this case, the analog mic/line input signals will be routed directly to the output channels.
Note
A Core processor is required to configure the SPA-Q amplifier for standalone operation.
Standalone Operation Examples
- A failsafe mode of operation if a network failure occurs. The amplifier will automatically switch over to standalone operation if it loses connection to the Core, and will automatically switch back to normal when the network connection resumes.
- A standalone four-channel power amplifier when no network connection is possible.
Requirements
- A computer running Q-SYS Designer
- Q-SYS Core Processor
- A network switch
- Appropriate network cabling
- An analog audio signal source
- A SPA-Qf 60x2 or SPA-Qf 60x4 model amplifier.
Configuration Procedure
- Set up the amplifier, Core, switch, and computer as a functioning Q-SYS network, if it
is not already in one. - Add the appropriate Core selected and the SPA-Qf amp model to a design.
- Select the Status block of the amplifier.
- Go to the Properties section.
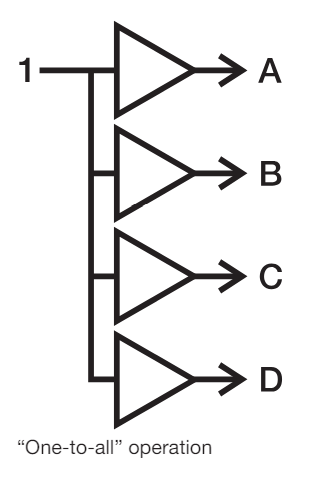
- Select Standalone Mode: One-to-all (there's only one option here).
- Select the desired Standalone Timeout period in seconds. The default
value is 16.
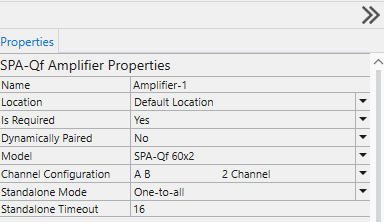
- Perform any other configurations needed, such as Channel Configuration.
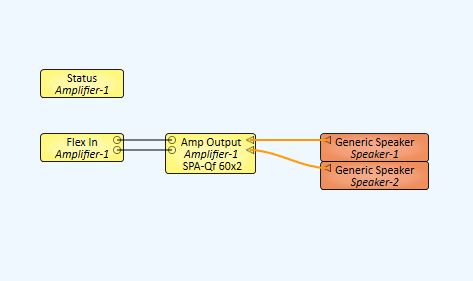
- Add appropriate loudspeakers to the design from Inventory.
- These should base on your speaker model specifications that will be connected.
- Connect the Flex Input component to the Amp Output component.
- Connect the amplifier outputs to the speaker in the design. This will load the processing parameters into the amplifier to provide appropriate loudspeaker processing even when the amplifier has no network connection.
- Save to Core & Run to upload the design to the Core.
- Connect an audio signal source into amplifier Flex Input 1. Adjust the source’s signal to the desired mic or line level.
- In the design schematic, open the amplifier’s output block.
- Because the amplifier has a standalone mode selected, a Standalone button appears at the right of the Amplifier Status block. This is for manually putting the amplifier into standalone operation.
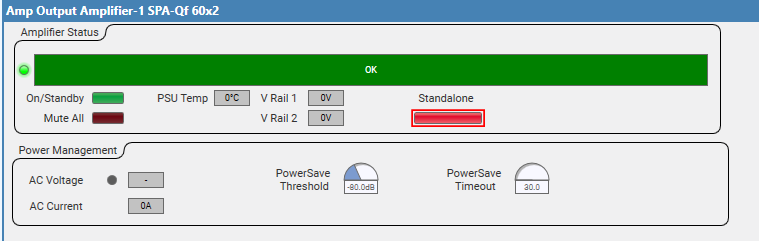
- Select Standalone and adjust Channel A’s Standalone Gain control (or the Mute button) to the desired output level, as shown on the meter. In many cases you will want the resulting standalone output level to be about the same as the normal output level; deselect and select Standalone as needed to compare and make adjustments.
The amplifier is now configured and will automatically switch to standalone whenever it does not detect and active network connection.