How To | How to configure LAG between Q-SYS NS Series Gen 2 switches
Gain insights on how to configure LAG (Link Aggregation) between Q-SYS NS Series Gen 2 switches
Procedure
Note
The steps below are only applicable for Q-SYS purchased NS Series Gen 2 switches (Netgear M4250) with Q-SYS Configuration loaded.
- Disable MAC Filter configuration on the switch ports that you want to configure LAG.
- Login to the Main UI of the switch
- Navigate to Security > Traffic Control > MAC Filter
- Select the existing MAC Filter with the MAC address of "01:00:5e:00:17:af" and the VLAN ID of “1675”
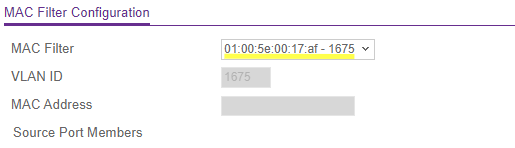
- Unmark the source and destination port members for the port you wish to configure LAG
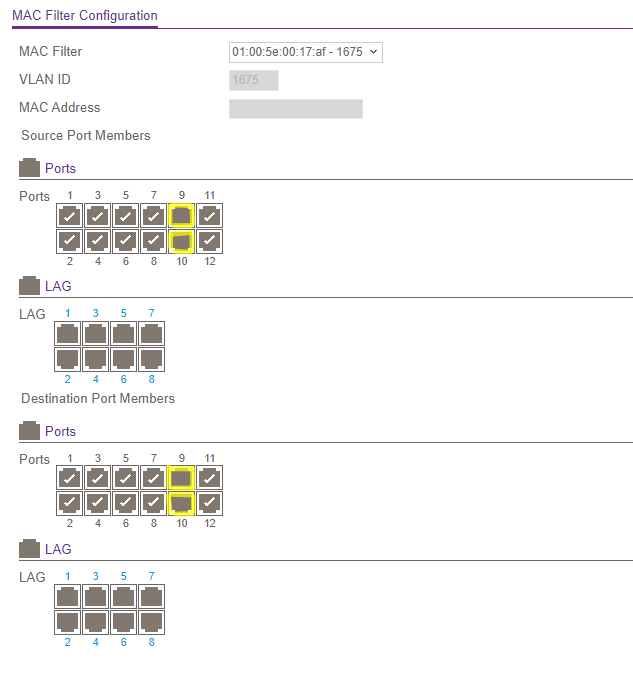
(In this screenshot, ports 9 and 10 were unmarked)
- Click Apply to apply the changes to your configuration
- Manually create LAG on the interfaces you desire.
- Login to the Main UI of the switch
- Navigate to Switching > LAG > LAG Membership
- Select the LAG ID from the drop-down list to the LAG number you desire to configure (Usually set to LAG 1 if this is the first time configuring LAG on the switch)
- Configure the LAG Name and the LAG Description as you desire
- Select the ports you wish to include in the LAG
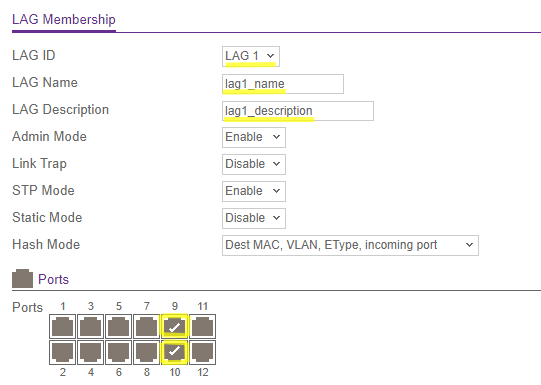
- Click Apply to apply the changes to your configuration
- Add MAC Filter configuration on the LAG interface you just created.
- Login to the Main UI of the switch
- Navigate to Security > Traffic Control > MAC Filter
- Select the existing MAC Filter with the MAC address of "01:00:5e:00:17:af" and the VLAN ID of “1675”
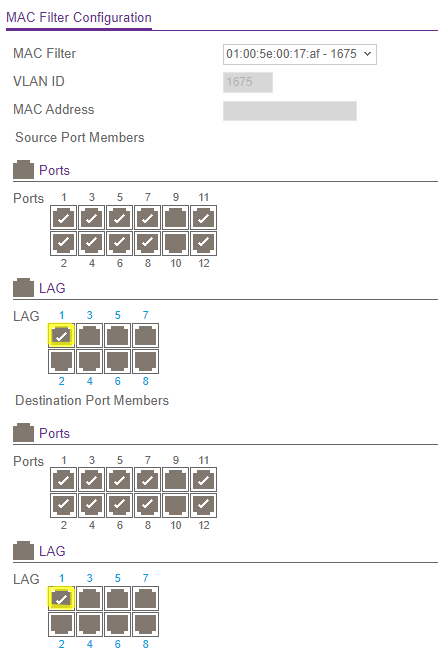
- Click Apply to apply the changes to your configuration
- Click Save to apply changes to the startup-config.
- Repeat the steps above on the other switch that you wish to configure LAG.