How To | Assigning a passcode to UCI Page
Learn how to easily create and assign a secure passcode to your UCI page for added protection and privacy. Follow these simple steps to ensure your account remains safe from unauthorized access.
Procedure
PIN Pad Component
Note
Q-SYS version 9.8 introduced the PIN Pad component.
Use the following steps to assign a passcode to a UCI:
- Add the PIN Pad component to your design.
- If necessary, set the PIN Count for multiple layers (default is 1).
- Copy the PIN Pad control elements to your UCI
- Add the UCI Layer Controller component to your schematic.
- Expose the Layer “x” Show control pins for the desired layers to assign PIN codes to.

- Expose the PIN Matched control pins on the component.
- Connect the coinciding PIN Matched control pins to the desired Layer “x” Show pins.
- Run or Emulate the design.
- Set the desired PIN codes in the PIN Pad component.
You will now be able to access different UCI layers based on the entered PIN code.
Note
This is just one example use case for the PIN Pad component.
The PIN Pad can also be set using scripting methods. For more information see the PIN Pad topic in Q-SYS Help.
Legacy Instructions
Note
These instructions are applicable to Q-SYS versions previous to 9.8.x.
Use the following steps for assigning a passcode to a UCI:
- Add a Logic And(Control Function) to design.
- Add a Softphone Component to design, drop status/control block in design.
- Copy Pin Pad from Softphone Status block and add to UCI Layer.
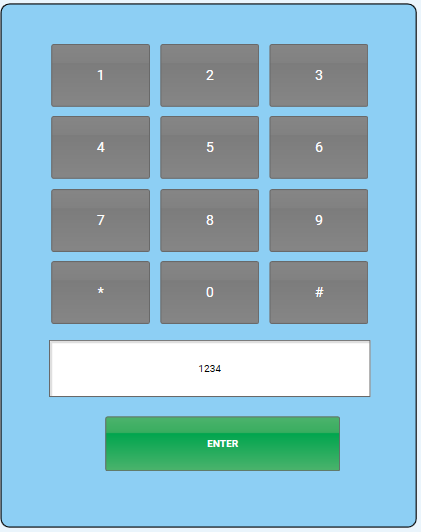
- Create a Snapshot Bank with the Dial String Component.
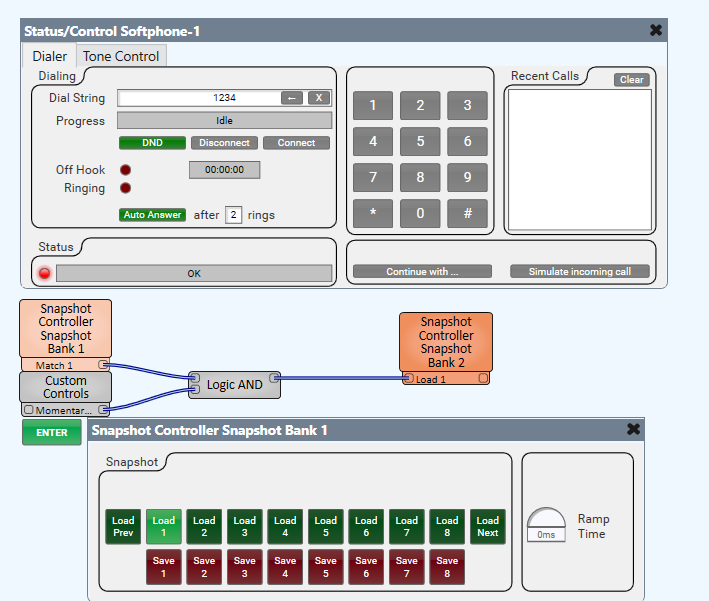
- In Emulations mode, enter desired passcode press save 1 under snapshot bank 1.
- Expose Match 1 control pin from Dial String Snapshot Bank. Wire Match Pin to input of Logic And.
- Add Momentary Button (Customer Controls) to design. Wire momentary button to other input on logic And
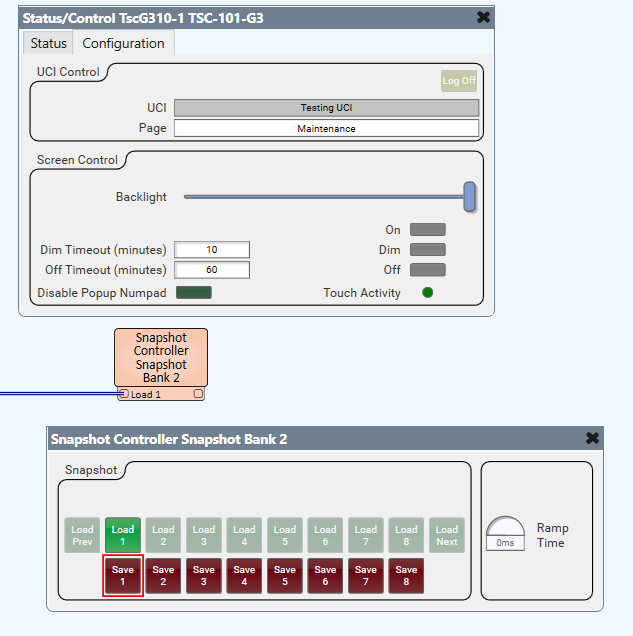
- Create a second Snapshot Bank with the current page component from the TSC or UCI Viewer.
- In Emulation mode, select the password protected page from TSC or UCI viewer status component.
- Wire the output pin from the Logic And to the load 1 pin for the TSC Page Snapshot Bank.
- When the matching password is enter on the UCI and the momentary button is pressed UCI Snapshot Bank will be load passcode protected page.
- Remember to provide some sort of navigation as a way to get out of password protected UCI page.
For more information, see the passwords section of Q-SYS Control Training: Advanced Control Components.
In the “Downloads and Links” section, you can download some Custom Components that are alternative solutions to this keypad puzzle.